Converting Markdown To HTML; In Any Mac Text Editor (With A Little Help From Automator)
There must be a truism somewhere out on the interwebs that goes something like this ...
if a computer geek finds himself or herself doing a task repeatedly, he or she will invariably find a way to automate this task
... and if there isn't a truism to this effect, then I've just written it for the first time.
In this particular case, the repetitive task was converting text written using John Gruber's Markdown syntax into HTML. Those of you who know Markdown will be asking the question "but Markdown is already a text-to-HTML conversion tool, why would you want to do this?". They'd be right too, so an explanation is due.
Each time I update one of my WordPress plugins, I use the updated readme file as the basis for updating the respective plugin's home page on my, WordPress powered, blog. Now I could use one of the existing WordPress plugins that allows me to write Markdown inside WordPress. I could, but I haven't. This is because, for now at least, Markdown support in WordPress is an all or nothing approach. Either you use Markdown everywhere or you don't use it at all. That's not good enough for my use case. I want to use Markdown selectively, on a few select pages only.
So I looked for a way of being able to convert the Markdown text of one of my plugin's readme files in a more selective fashion. I wanted to be able to take a readme.txt file in my text editor of choice and convert it from Markdown into the page I was currently editing in WordPress in the browser. A not inconsiderable amount of web surfing later and I had a solution which almost but not quite got me 75% of where I wanted to be. Adding in support for the current version of Mac OS X and adding a small amount of extra functionality got me to 90%. Now granted, 90% isn't 100%, but to my mind 90% is far better than 0% and 0% was the repetitive task of selecting, copying and pasting the sections of the readme into WordPress and manually converting the Markdown syntax into HTML tags. This is not only repetitive, it's error prone and downright tedious.
Firstly install Markdown on your Mac. There's a variety of ways of doing this but as I already use Homebrew to install all manner of command line stuff, I checked to see if Markdown was supported by the brew command and went ahead and installed it.
$ brew search markdown
markdown    multimarkdown   peg-markdown
$ brew install markdown
==> Downloading https://daringfireball.net/projects/downloads/Markdown_1.0.1.zip
######################################################################## 100.0%
/usr/local/Cellar/markdown/1.0.1: 2 files, 40K, built in 2 seconds
$ which markdown
/usr/local/bin/markdown
Then fire up Automator, located at /Applications/Automator.app. Choose Service as the type of Workflow you want to create.
 Add the
 Run Shell Script Action, which is located under the Utilities section of the Actions Library.
 Homebrew installed Markdown as
 /usr/local/bin/markdown so change the default Action from cat to the path to Markdown. I also chose to make the output replace the text I had selected, you may or may not want to do this.
 Then add the
 Copy To Clipboard Action, again located under the Utilities section of the Actions Library.
 Then save your workflow and give it a meaningful name; Automator will save this as
 Markdown.workflow in your ~/Library/Services folder.
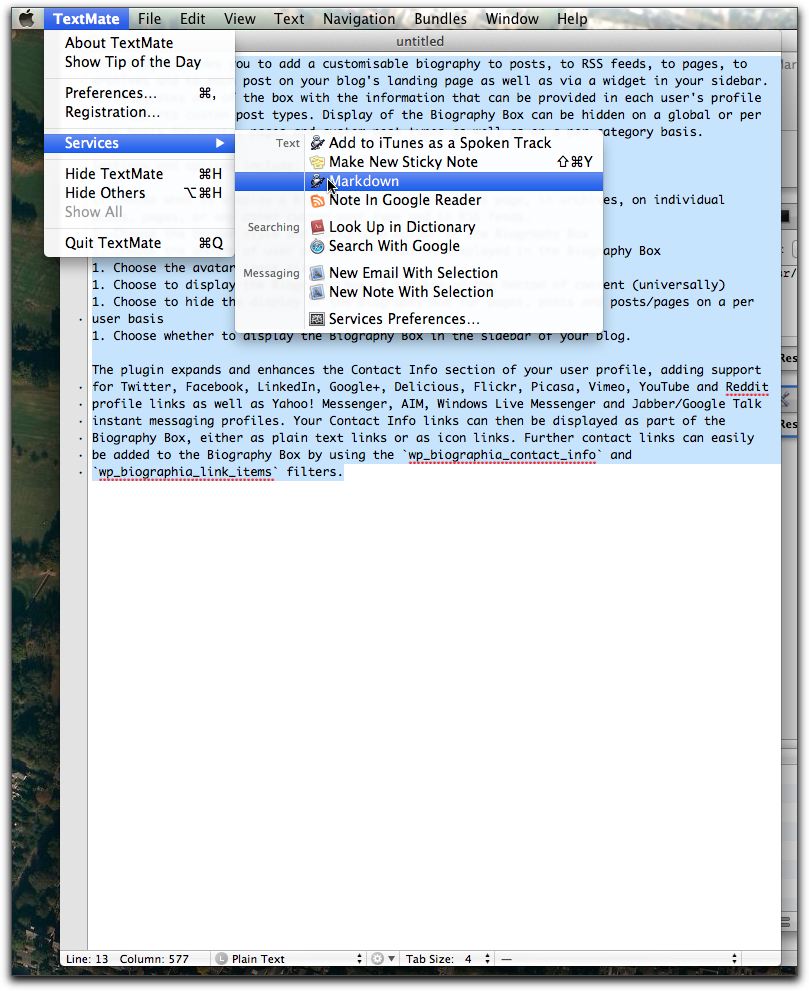
 Now I can use this workflow to convert Markdown formatted text to HTML. The workflow I'd just created is now available through the Services menu of any text editor on the Mac. I'm using TextMate but this applies to all apps on the Mac that are capable of working with plain text. If you load up a Markdown formatted file in your text editor of choice and go to the
 Services menu item, you won't see your workflow initially.
 You need to select the text you want to convert. Then go back to the
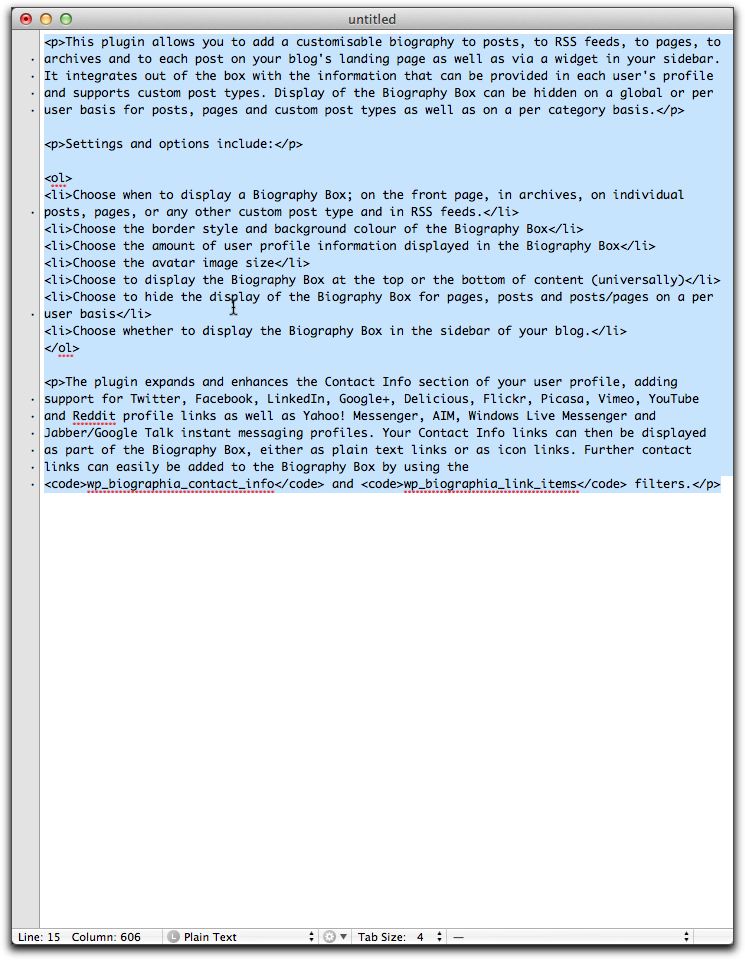
 Services menu item and you'll see Markdown as a Text Service. Click on this and your highlighted text will be converted to HTML in situ and the resultant HTML will also be on the clipboard as well, ready for pasting into WordPress or whatever you want to use to hold this HTML.
 You can also get access to the
 Services menu by Control-clicking on the highlighted text as well.
As Aaron Cope once said, The label on the tin reads: "It ain't pretty or classy but it works" and for now, that 90% I mentioned earlier is good enough.
